
SME apps/web
Manual vs. card expenses
If enabled, your clients can create manual expenses.
These are not automatically tracked and reconciled in opposition to expenses paid by card. The feature intends to enable a company to record any expense incurred by someone in the company.
On the other hand, card expenses are linked to card payment and the user just needs to pay, or the card will be charged a subscription; immediately the transaction will appear in the list of expenses and will be reconciled against a payment.
Also, it's considered PAID while the manual expense can have both statuses by default, PAID or UNPAID, depending on how the manual expense is created.
Create manual expense
To create a manual expense, select the action button on top of the expenses section, and in the header of the app under the 'Add up' icon.
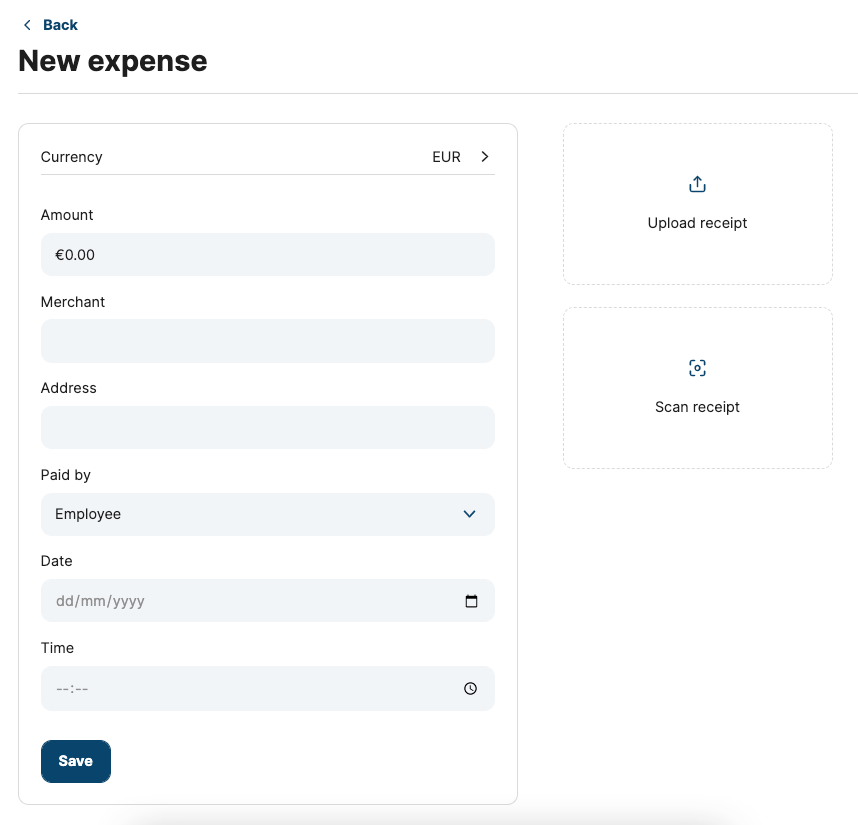
In the first step, the expense can be saved in the currency that has been paid. For E.g. an expense paid in USD can be registered as USD despite not having any accounts in USD.
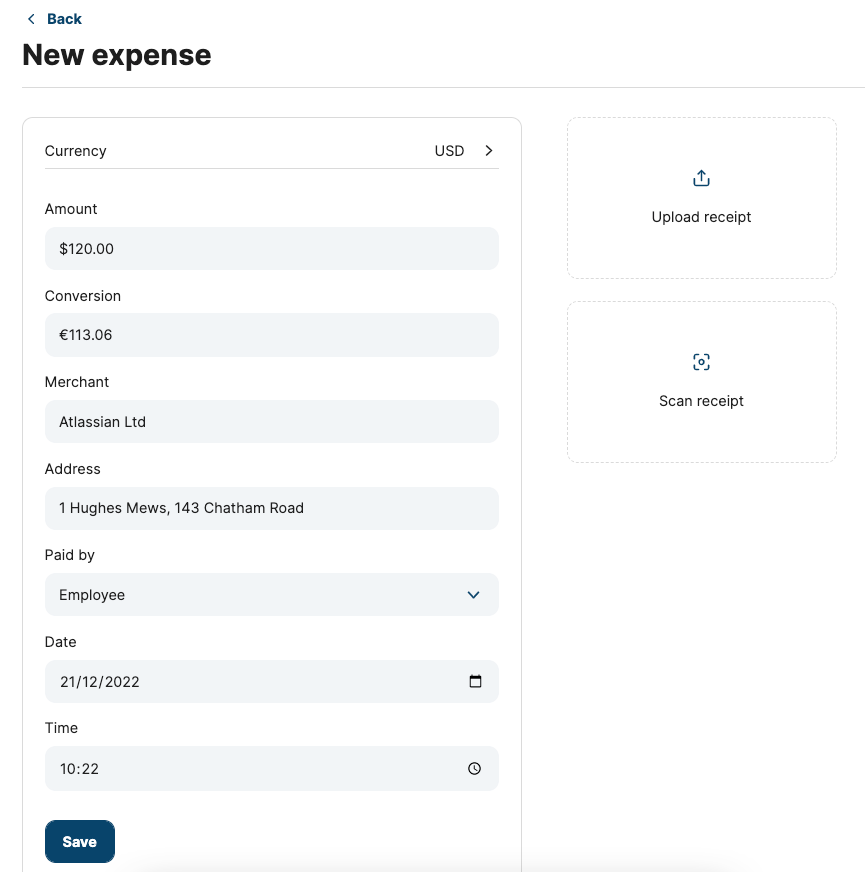
In the screenshot above, you can find the currency selector filtered by currencies containing the string 'US' and the form after selecting USD. As you can see, a new field is shown with a conversion to the main currency of the company, which is calculated based on the fly taking the currency exchange rate for the moment of the creation of the expense.
In addition to the fields: amount, conversion, merchant, address, date and time, there is also another relevant field: Paid by. This field will determine if the manual expense is saved as paid or as UNPAID.
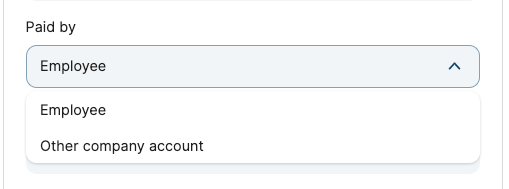
- If the expense is 'Paid by Employee', the status will be considered as UNPAID and, because of this, will need to be paid by a Director to the employee (if the expense is approved).
- If the expense is 'Paid by Other company account', the status will be PAID and won't need to be approved since it's considered a spent approved and reconciled in another account without access from the current platform.
At last, files can be attached to the expense:
- Uploading a file
- Scanning a file
Edit manual expense and delete manual expense
Any manual expense already created can be edited by the transaction owner of the expense. Any data added previously is subject to editing until the expense is saved as paid. To access the editing of a manual expense find the 'Edit expense' button in the header.

'Edit expense' and 'Delete expense' are the actions available to them because they are the transaction owner of the expanse and it's still UNPAID. Actions 'Deny' and 'Pay' are shown because they have permission to pay and deny manual expenses.
Expenses list:
See 'My expenses' list
If 'Expenses' is ON, any end-user will be able to access the action from the menu, regardless of their permissions. Once landed in the section, they will find the following features:
Filter my expenses per time
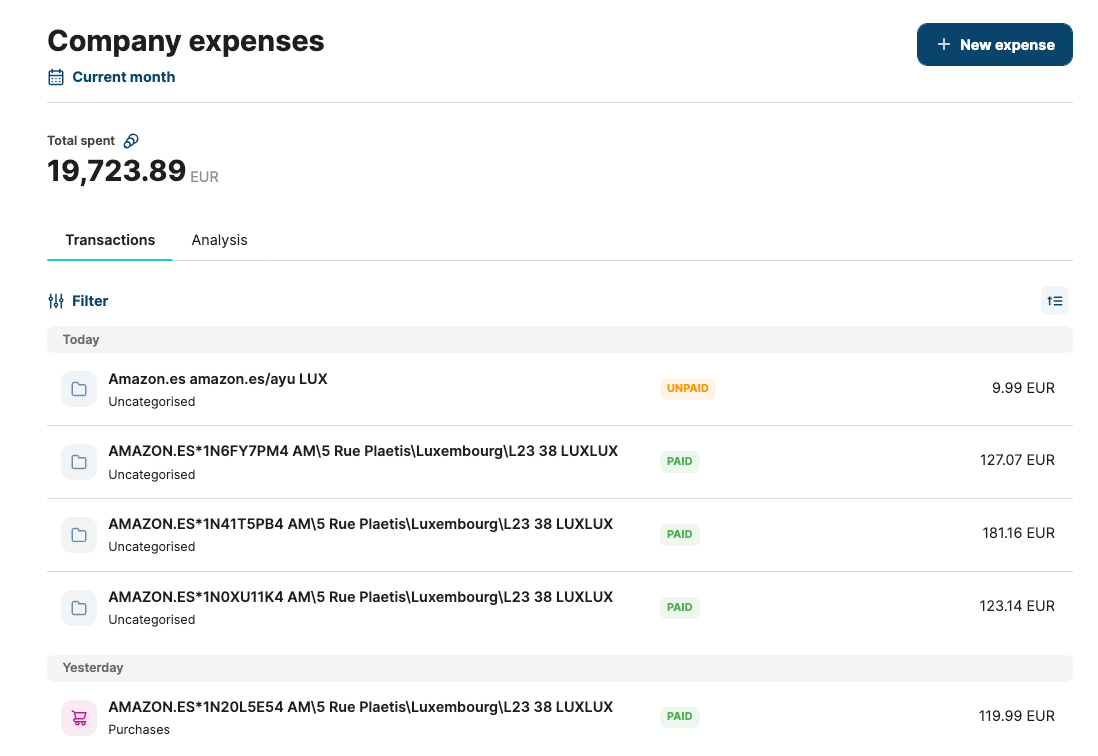
By default, when accessing 'My Expenses', the following list will appear:
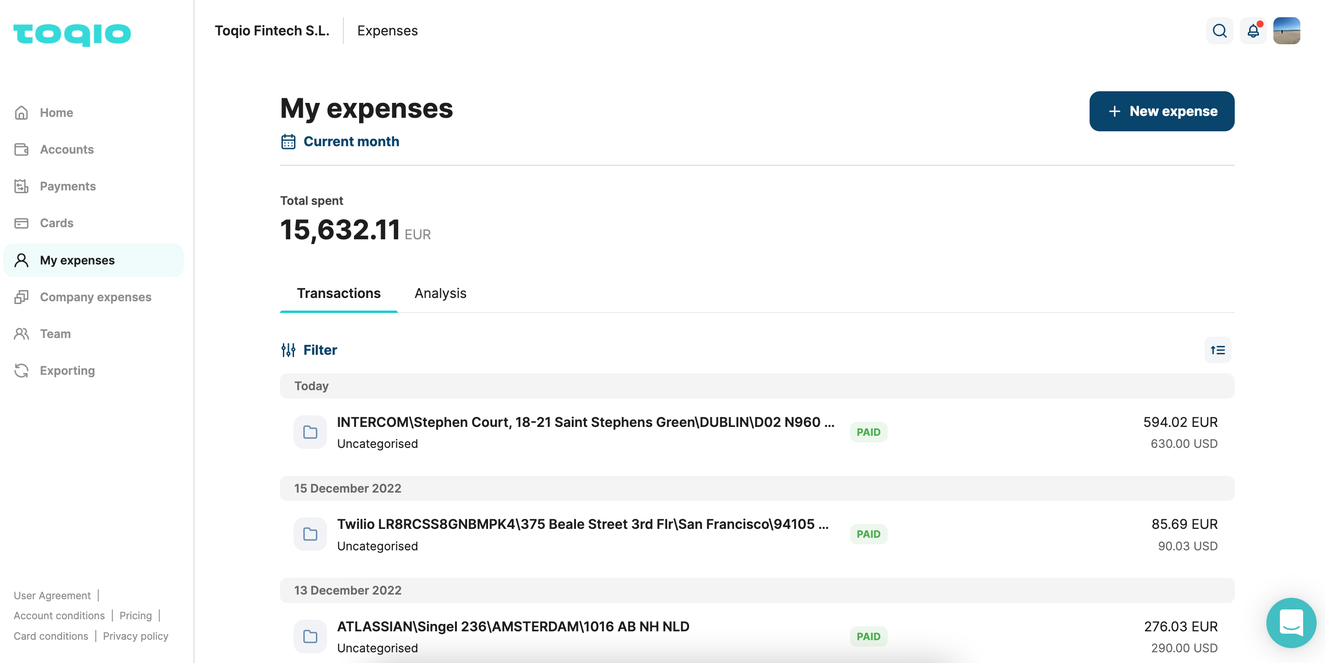
This by default view is filtered to show current month expenses, ordered from more recent to older. However, these filters can be updated to find relevant information for each user. Below the page title 'My expenses', by selecting 'Current month' the platform will show the next options:
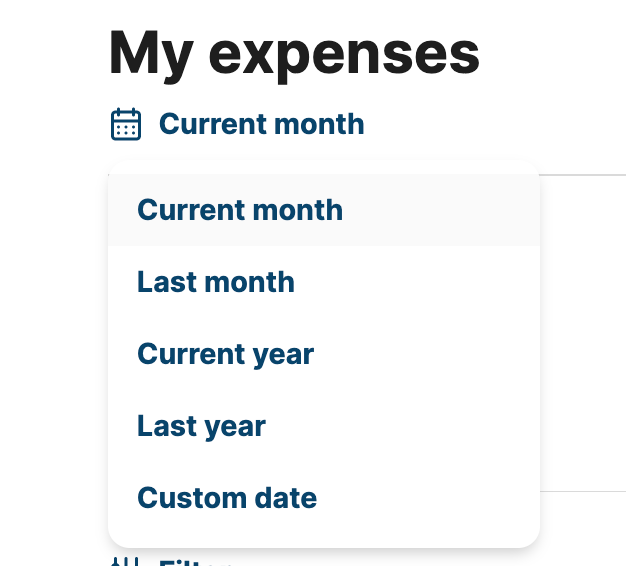
By selecting any of the filters, the data will be updated to show expenses for the period. Same by selecting 'Customer date', where a date selector (FROM - TO) is presented to the end-user.
Any changes applied to the filter will apply to the Total spent figure shown showing the total amount spent for the selected period.
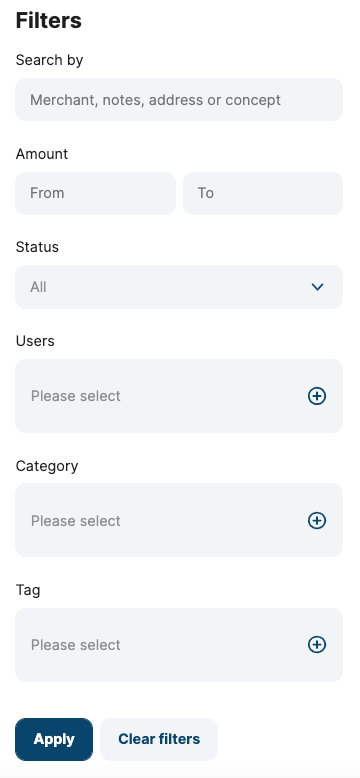
In addition to these options, some other filters can be applied to the list by selecting 'Filters' in the top left corner of the data table. This will launch a filter modal to apply new filter criteria based on the following parameters:
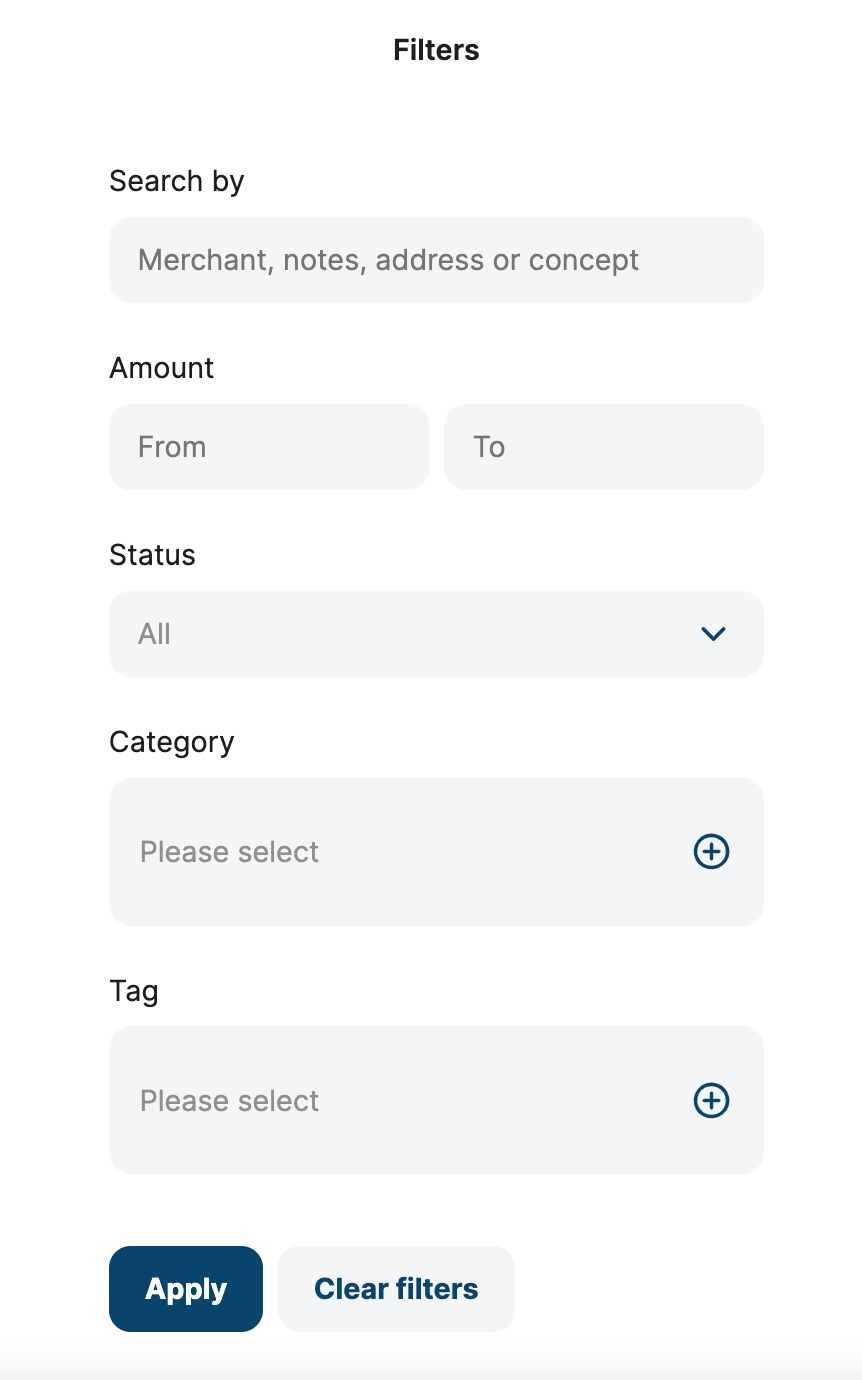
- Search by merchant, address, concept, note, etc.
- Amount FROM - TO
- Status of the expense
- Category
- Tag
See the analysis of my expenses per category and tag
In addition to filters by default and custom filter criteria, in the section, you can find some pre-configured analyses for your expenses. In the 'Analysis' tab you can find more information about the categories and tags of your expenses.
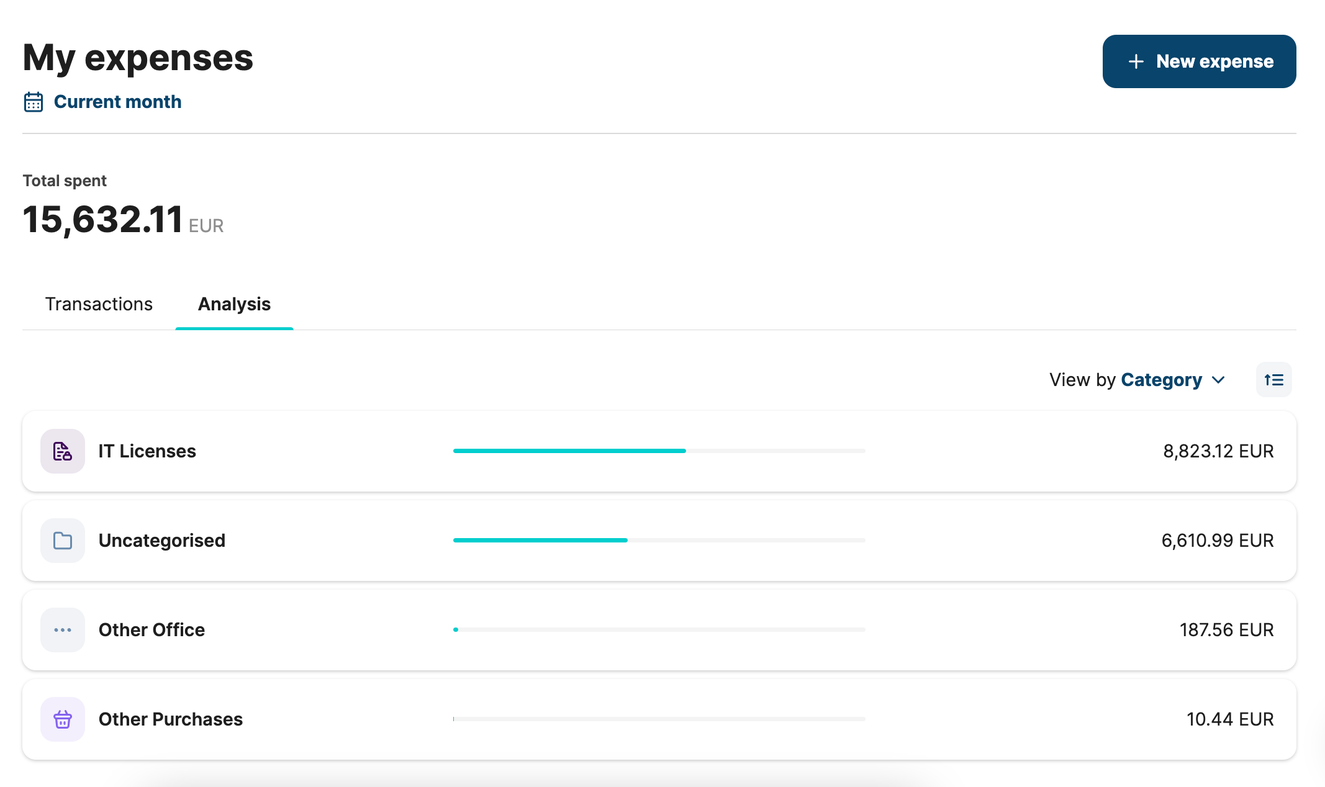
Expenses filtered by category in the current month
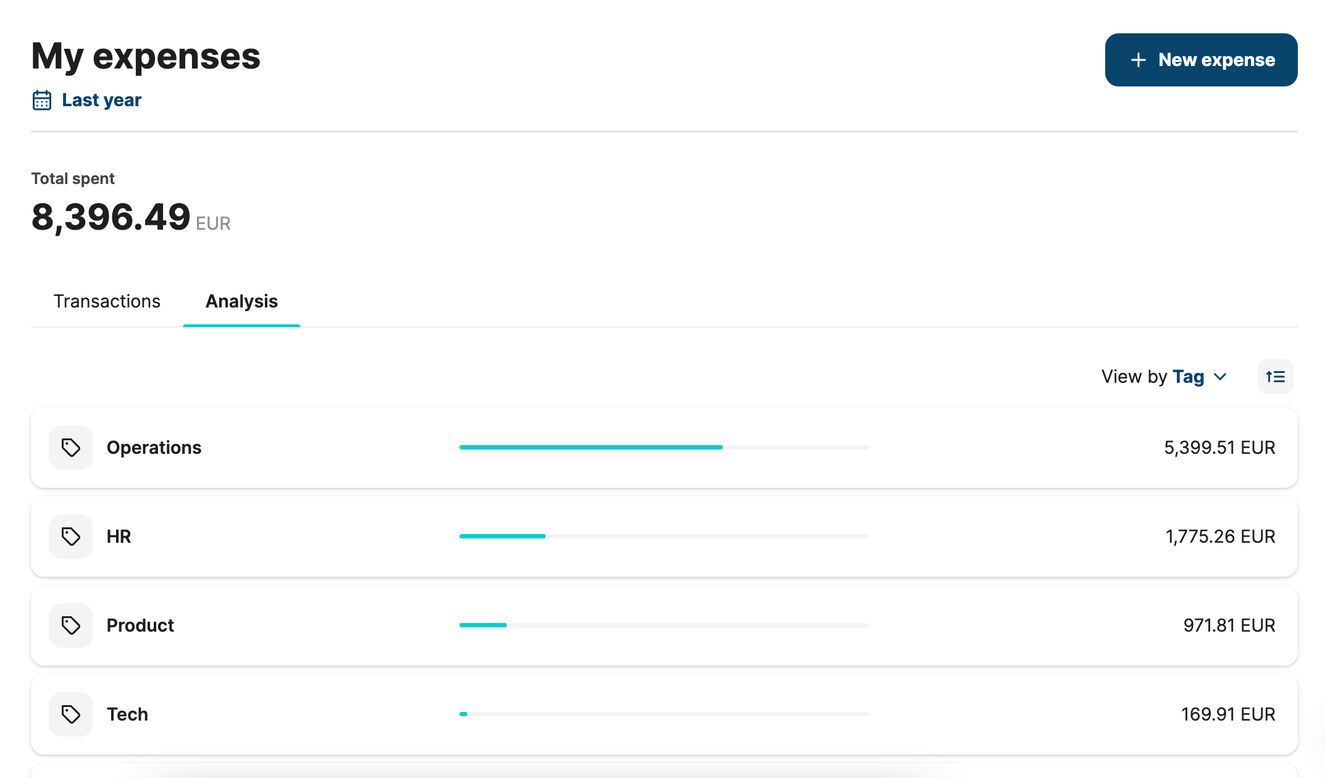
Expenses filtered by tag in last year
As shown in the screenshot above, expenses can be filtered by category and by tag. The total spent value will also be affected by the filters applied. By selecting 'My expenses' per category in the current month you can find a total spend of almost 16k euros, which will match the total spent that month since all the expenses are counted, including those uncategorised.
When selecting by tag, the Total spent value could not match the Total spent for the period selected since it will add up only the expenses tagged.
Therefore, in the screenshot above you can see that expenses tagged for the last year add up to a Total spent of more than 8K euros, despite the total spent for the year could be much higher.
In the list shown above, by selecting one category or tag tile, you will be redirected to a filtered list with expenses in the category or tag selected, ordered by default from more recent to older in the period previously selected.
See the company expenses list
If expenses are ON, any end-user will be able to access the section in the menu 'Company Expenses' if they have appropriate permissions. Once landed in the section, they will find the following features:
Filter my expenses per time
By default, when accessing 'Company Expenses', the following list will show:
This by default view is filtered to show current month expenses, from more recent to older. However, these filters can be updated to find relevant information for each user. Below the page title 'Company Expenses', by selecting 'Current month', the platform will show the next options:

By selecting any of the filters, the data will be updated to show expenses for the period. Same by selecting 'Customer date', where a date selector FROM - TO is presented. Same as the time can be filtered, the order of the items can be switched from older, to more recent by selecting the action button on the top corner of the list.
Any changes applied to the filter will apply to the Total spend figure shown showing the total amount spent for the selected period.
In addition to these options, some more filters can be applied to the list by selecting the link 'Filters', in the top left corner of the data table. This will launch a filter modal to apply new filter criteria based on the following parameters:
- Search by merchant, address, concept, note, etc.
- Amount FROM - TO
- Status of the expense
- User owner or owners of the expenses
- Category
- Tag
See the analysis of company expenses per employee, category, and tag
In addition to filters by default and custom filter criteria, in this section, you can find some pre-configured analyses of your expenses. In the 'Analysis' tab you can find information about Employees, Categories, and Tags.
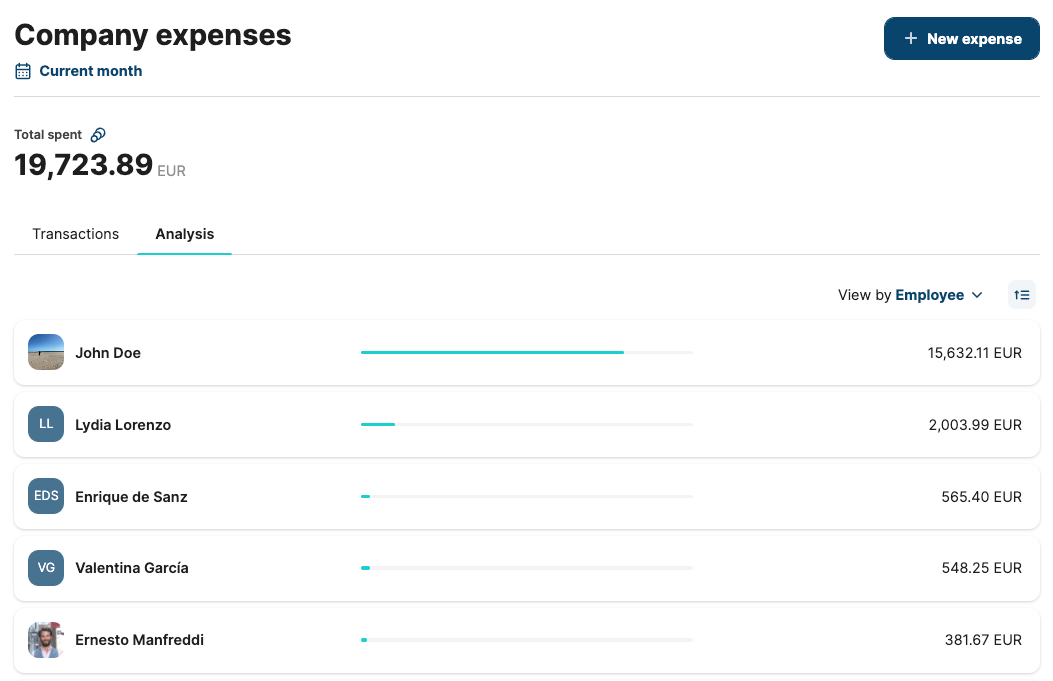
Expenses filtered by Employee in the current month
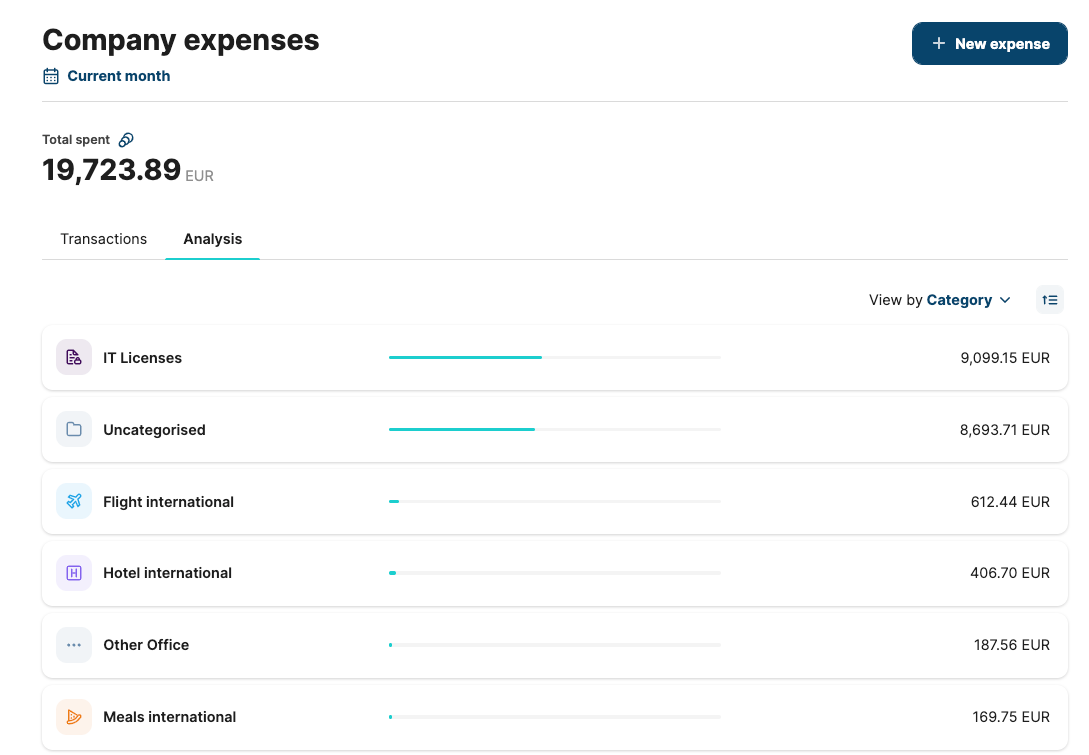
Expenses filtered by Category in the current month
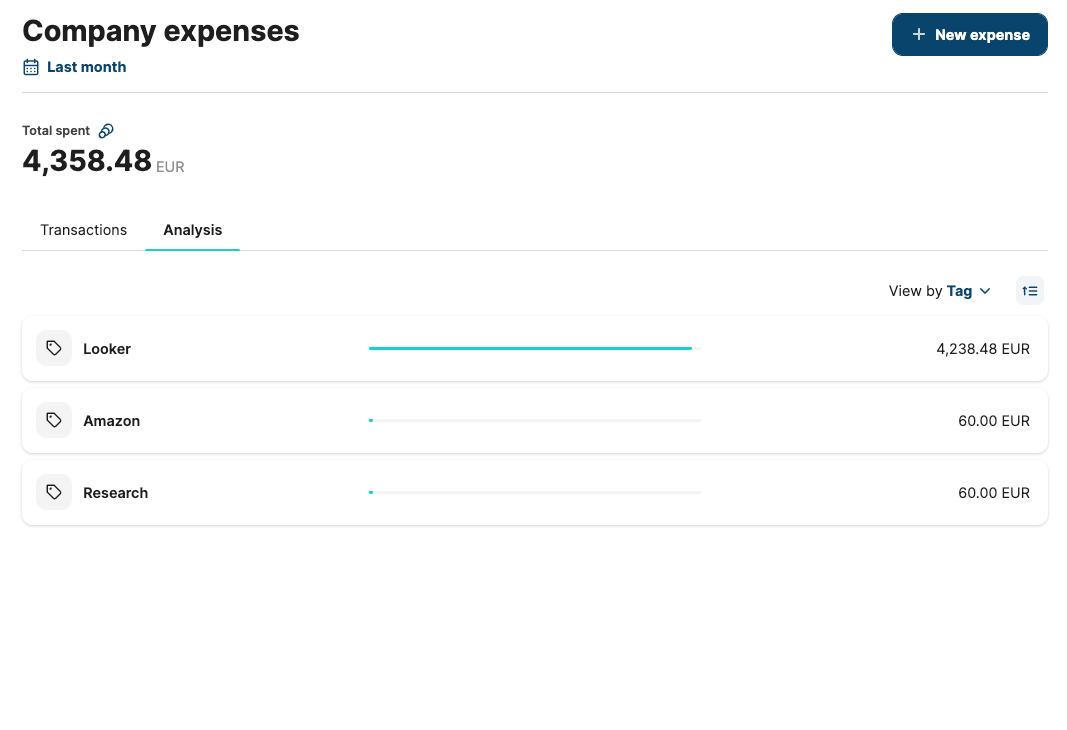
Expenses filtered by Tag in the last month
As shown in the screenshots above, expenses can be filtered by Employee, Category, or Tag. The total spent value will also be affected by the filters applied. By selecting company expenses per category in the current month the total spent is almost 20K euros, which will match the total spent that month since all the expenses are counted, including those uncategorised.
When selecting 'by tag', the Total spent value could not match the total spent for the period selected since it will add up only the expenses tagged.
Therefore, in the screenshot above you can see that expenses tagged for the last year add up to a total spent of more than 4K euros, despite the total spent for the year could be much higher.
In the list shown above, by selecting one employee, category, or tag tile, you will be redirected to a filtered list with expenses owned by the employee or in the category or tag selected, ordered by default from more recent to older in the period previously selected.
Expense detail:
By selecting any expense, you will be redirected to the expense detail:
- Expense header

In an Expense, in the header, you will find relevant information about the spent:
- Total amount: this is the amount paid in the currency of the original account. In the screenshot, a few lines below you will find a total of €276.03 for an invoice in USD. The account is charged based on the exchange rate at the moment of collecting the payment by the banking provider.
- Status: expenses can have different statuses, based on the type of expense and the payment lifecycle:
- PAID: funds have been withdrawn from the account and confirmed, either if they are manual or automatic expenses.
- PENDING: funds are reserved but the outbound payment is not confirmed yet. These expenses can take up to 24 hours to be confirmed but the available account balance will be deducted for this reserve. This will only affect automatic expenses.
- UNPAID: manual expenses that are still subject to be paid. When the expense is approved/paid by a Director, a payment transaction is created to the employee's account and the funds will be deducted from the available balance and from the total balance when the outbound payment is confirmed.
- DENIED: if the manual expense mentioned above is denied by a Director, the status will be updated accordingly. This status is not reversible so, when an expense is denied, it cannot be updated to another status. Also, the amount spent will not be considered as part of the company expenses nor added up to any of the totals.
- FAILED: when a card payment fails because of any reason, the failed transaction will be shown in the account statement and the card movements list, but won't be listed in the expenses list and not be considered for the expense amounts.
- Merchant and address: just below the expense status you will find the merchant name and the address of the company as it is received from the banking provider.
- Date and time: date and time of the expense when it's confirmed and the funds are effectively withdrawn from the original account.
- Header actions: detailed information can be found in the next section.
Header actions
There are some dynamic actions based on expense status, but there are also other elements that are fixed in the details. In the screenshot below you can find the details of an expense PAID by card, categorised with an attachment. By running different buttons, the expense header will dynamically change to show relevant actions.
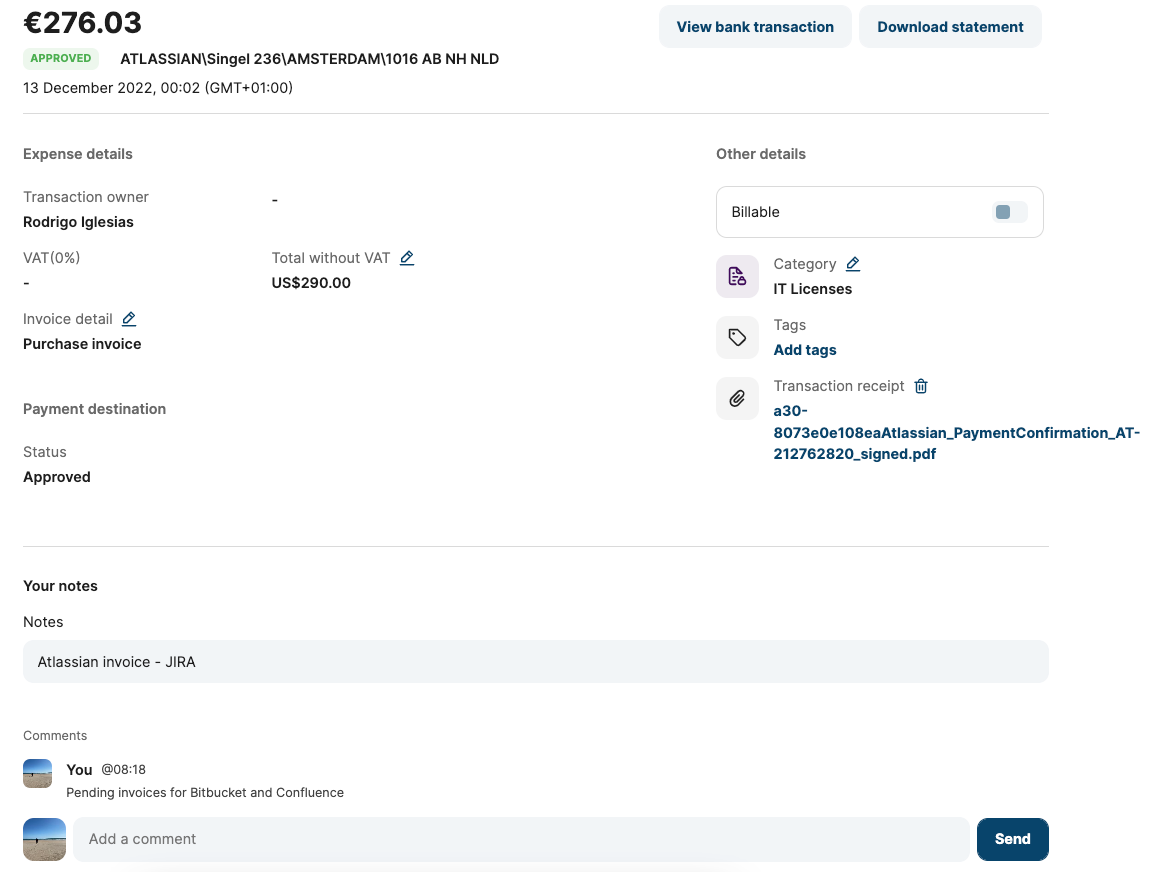
As shown in the screenshot above, the main actions for this expense, given the fact that it has an invoice attached, are categorised and it's paid, are not writing actions, instead, enable the download of a statement and link to the reconciled outbound payment.
Expense bag

In addition to the information and actions already described, in the body of the expense there are also a few options and data relevant for accounting and management purposes:
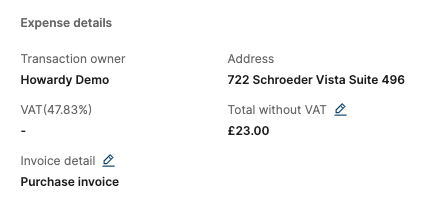
- Transaction owner: being the expense automatic or manual, there will be a transaction owner. This can be the cardholder or the person creating a manual expense.
- VAT: the VAT will be updated automatically when the expense is categorised. This logic will apply different VAT percentages based on more parameters than the category; if the expense is in a different currency than the original account, it will remain at 0%. Also, VAT percentages will depend on the location of the company, applying general VAT for the EU and UK VAT for companies located in the UK. However, this can always be manually updated if, because of any reason, the automation is not accurate for the user by updating the Total without the VAT field.
- Total without VAT: this is the total paid without VAT. This field will be automatically calculated when a VAT is applied based on the automation described above, or manually added by the user. This is the reference value to calculate the VAT applied to the expense.
- Payment destination: this field will be fulfilled when received in the expense detail from the acquirer, and will typically show a destination account if it exists.
- Status: indicates the status of the expense as in the header.
- Notes: a text area field to add any relevant information related to that expense.
- Comments: This section creates a threaded dialogue for users with access to the expense to ask for more information or record any relevant comment affecting the expense.
- Billable: selector to define if an expense can be deducted from the invoices emitted by the company.
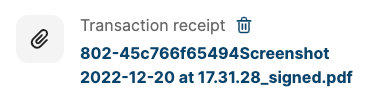
- Transaction receipt: document uploader and viewer for either receipts or invoices.
- Category
- Tags
- Invoice detail
Manage my expenses:
In this section, we review the more relevant actions that can be performed to handle expenses and make more efficient use of them.
Pay/Deny manual expenses
Expenses created by an employee or a Director that has been paid with money out of the known accounts can be paid since these are considered a debt owed to the transaction owner.
To pay a manual expense some pre-conditions need to be ready to manage the payment:
- The transaction owner has added details about their account number. This is available from the Chaning settings section and based on the accounts created at a client level, the user will be able to add a personal account in GBP or EUR. If this condition is not met, there will be an alert displayed to the Director trying to pay, as shown in the screenshot below.
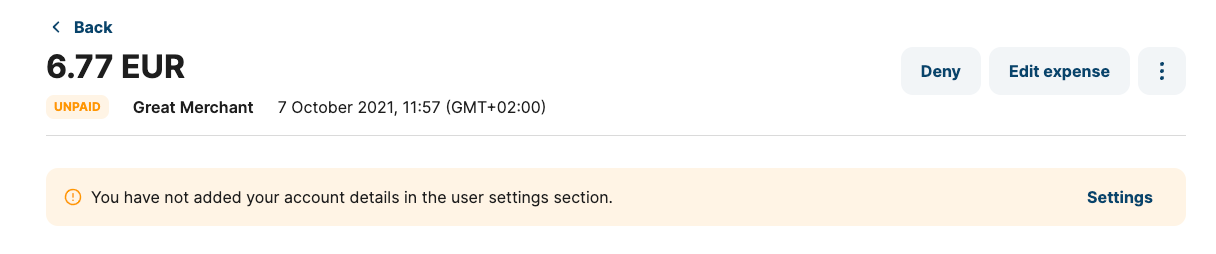
Directors trying to pay their own manual expense
- There are enough funds in the accounts to pay the expense. If this scenario is not met, the following alert will be shown:

- Whenever previous conditions are met, the Director running the payment, if they have more than one account, will find the following journey:

By selecting 'Pay', the following window will pop up, and if there is more than one account in the expense currency, the Director could select the origin account for paying the expense.
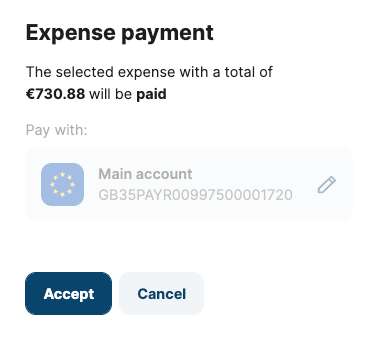
Once the payment action is ordered, a pending payment transaction will be shown in the 'Payment' section. Also, the expense will be reconciled with the payment and the status will progress to PAID. If for any reason the payment of the expense is rejected, the expense will go back to its previous status UNPAID and an email notification will be sent to the Director to notify them of the failed payment.
Once the payment is completed, the expense amount will be added up to the expenses total amounts.
- Denying an expense is an action that is present in all the statuses but paid. A PAID transaction cannot be denied and, likewise, a DENIED transaction cannot be PAID, so both actions are irreversible.

A denied expense won't be present in the list of transactions in the account or add up to the totals.
Categorise
Part of the core functionality of 'Expenses' is the capability of the expenses for accounting purposes. As seen in previous sections, the analysis of expenses presents totals per category, which is a very good insight to understand the business. Besides that, categorising an expense will automatically apply the typical VAT for that type without the need of editing the expense in that sense.
Categorising an expense is one of the main actions present in the expense details. By selecting the action link or button, a pop-up window is presented.
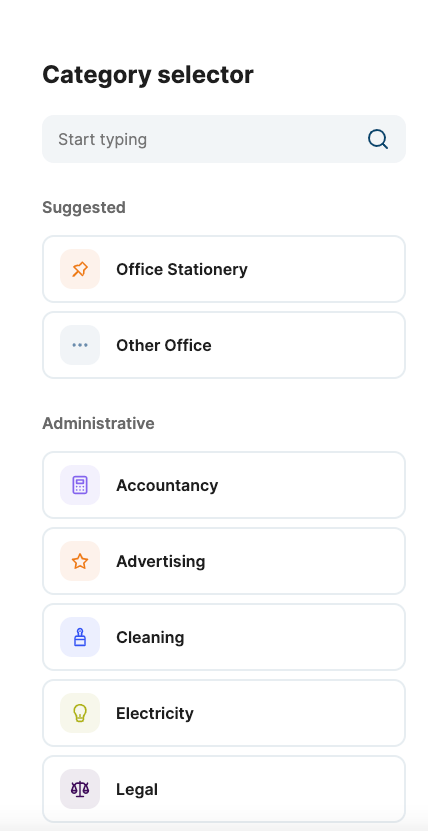
As shown in the screenshot above, the anatomy of the category selector is composed of three main tiles:
- Search category: by typing any character, the list will be updated searching for the string in the input.
- Suggested: based on our model of AI and Machine Learning, we suggest categories that fit the merchant of the expense. This is based on several parameters such as a merchant, MCC, previous categorisations of the end user, location of the merchant, currency, etc.
- Categories: all the existing categories are grouped by main category and ordered alphabetically by the name of the categories group.
This is the complete list of categories presented to the end user:
| Administrative | Entertainment | International travel | National travel | Office | Other expenses and services | Services | Uncategorised |
|---|---|---|---|---|---|---|---|
| - Accountancy - Advertising - Cleaning - Electricity - Legal - Bank fees - Subscriptions - Insurance - Taxes | - Client entertainment - Team entertainment | - Flight - Hotel - Meals - Taxi - Train - Petrol - Other travel | - Gas - Water - Groceries - Maintenance - Office Stationery - Other office - Post - Printing - Rent | - Direct costs - Postage - Professional - Purchases - oTHER PURCHASES - sUB-CONTR | - Direct costs - Postage - Professional - Purchases - Other purchases - Sub-contractors - Training - Vehicle expenses - Suspense | - Internet - IT Licenses - Telephone | - Personal uncategorised - Uncategorised |
It's worth mentioning that the 'By default' category assigned to an expense is Uncategorised until it's assigned to the appropriate category.
Add attachment
An expense can be enriched by adding attachments. These attachments can be any sort of document, but we recommend sticking to official documents such as receipts or purchase invoices.
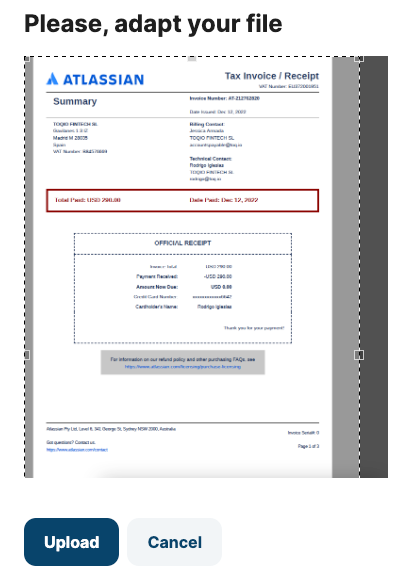
- Adding an image file: you can take a picture straight forward from your mobile device or attach it from the file storage from any device. In this case, a window with the attachment will be visible where you can crop and resize the image if needed. Once the file is uploaded, a PDF copy is generated and signed with a digital certificate. This ensures the image is a digital ticket for Spanish tax authorities, which grants this digital copy as a legit receipt. For other legislations, this is an addition to the functionality but not required, in general terms, as a legal requirement.
- Adding a PDF file: uploading a PDF won't show a preview of the file, but the process will remain the same in terms of the digital signature of the file.
Any attached file can be viewed, downloaded from the preview window, and also deleted by selecting the link, regardless of the status of the expense.
Save as invoice/purchase receipt
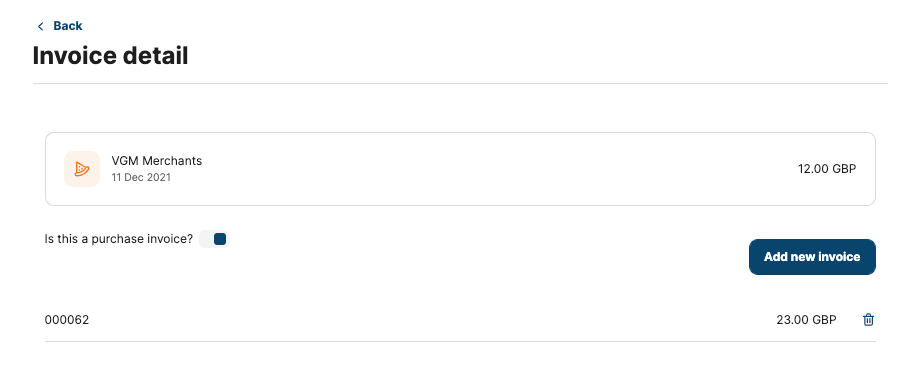
Once an expense is added, either manually or automatically by paying with a card, the option of updating the default type, expense, and to be recorded as an invoice exists. By selecting the action link 'invoice detail', you will see a preview of the merchant and a selector to edit the invoice itself.
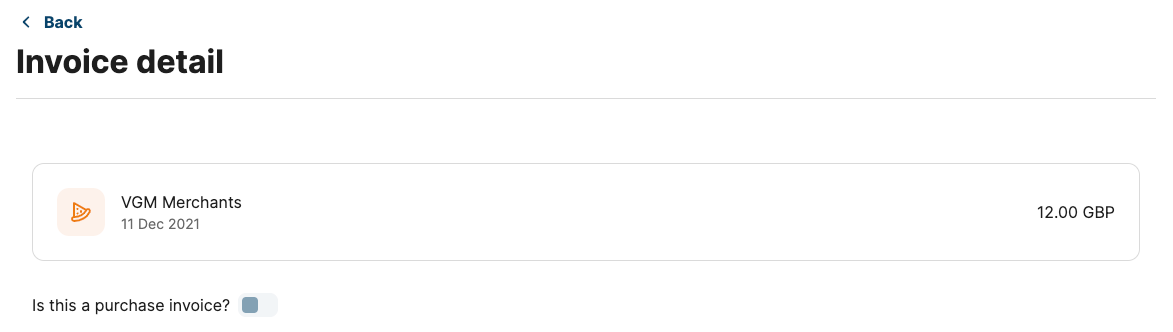
By selecting it as a purchase invoice, you will be asked for confirmation and will find the following form to add the invoice details:
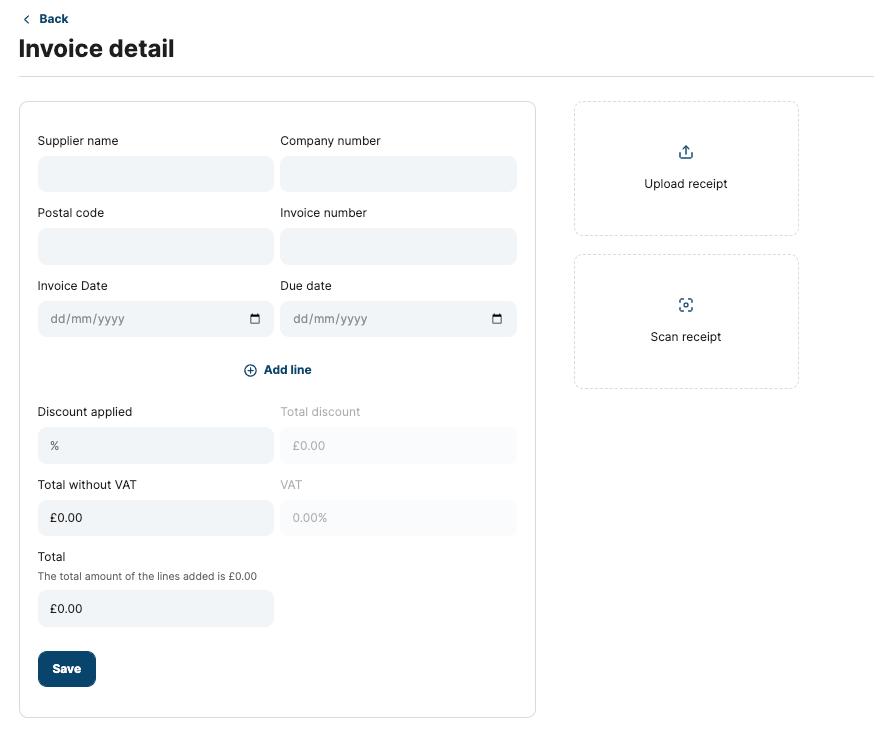
'Add an invoice' empty form
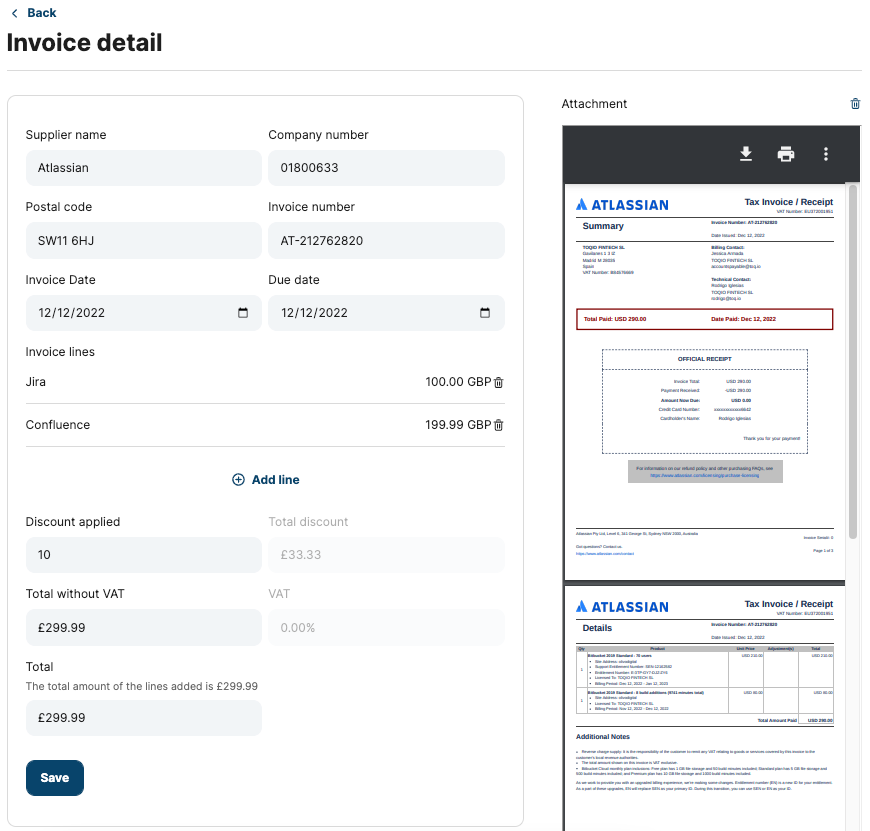
Invoice form fulfilled
In addition to the form itself, a PDF or image can be scanned and uploaded. Any field recognised by the OCR will be added to the related form field. The system is a machine learning engine, so any corrections will help improve the OCR system.
A detailed invoice can be added by supplier name, company number, postal code, invoice number, invoice date, due date, discount applied, total without VAT, and total. The field's total discount and VAT are calculated automatically based on the information provided.
Also, a sub-form can be used to add existing lines in the invoice by selecting 'Add line'
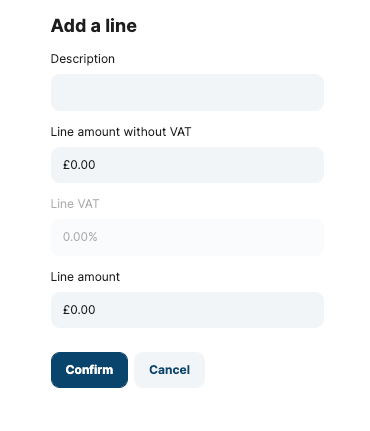
Add a line form
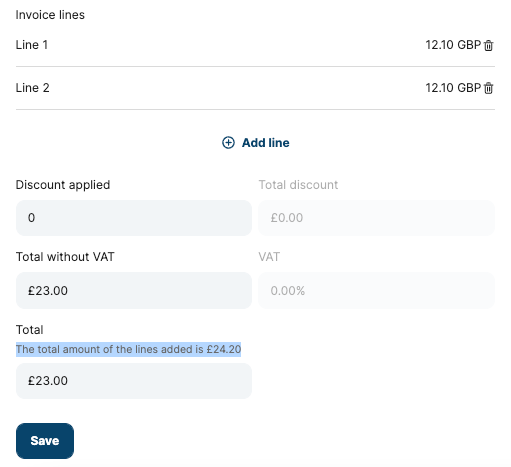
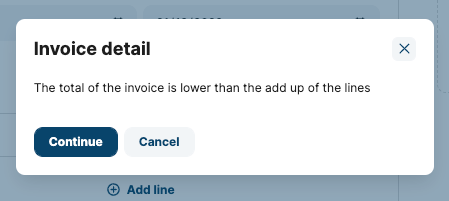
The invoice with a lower total than the add-up of lines
This form will add as many lines as required to the invoice detail. The total presented in the Grand Total will not consider the add-up lines but will show a suggestion on top of the field, as shown in the image above. Also, an alert modal will show when trying to save.
Once the invoice is saved the attachments will be signed and certified and can be found in the expense detail. Also, the details of the invoice can be reviewed by accessing the detail.
Edit VAT applied
VAT is automatically calculated based on the categorisation applied to the expense or after scanning an invoice or receipt. However, since this mechanism could fail or there are exceptions that, despite the category, the VAT could be something uncommon, the field can be modified manually.
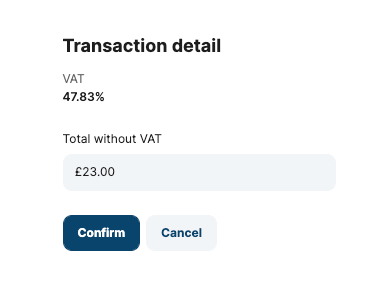
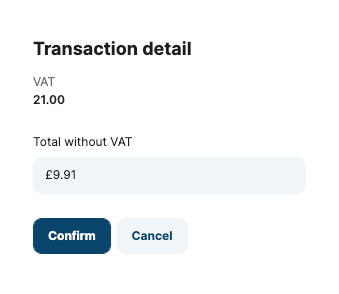
By selecting the Total without VAT link button, a pop-up window will require the user to modify the value of the Total without VAT field. This will, automatically, calculate the VAT applied, as shown above. Also, the expense detail will be updated accordingly.
How is VAT percentage and amount calculated?
In the 'Transaction details' screen →
- VAT
({vatPercentage}% ) - Amount
totalWithoutVat * vatPercentage / 100{currency}
In total without VAT edition modal →
- When changing
totalWithoutVatvalue,vatPercentagealso changes and this is the current calculation:(total - totalWithoutVat) / totalWithoutVat * 10
Add tags
To help you track expenses with extra filters, tagging expenses is available. The tags are departments, customers, projects, or whatever makes sense for your needs. This flexible system allows not only to add tags to an expense but also to create custom tags to filter them in the analysis tab.
By selecting the 'Add tags' button a new window will open with a list of existing tags:
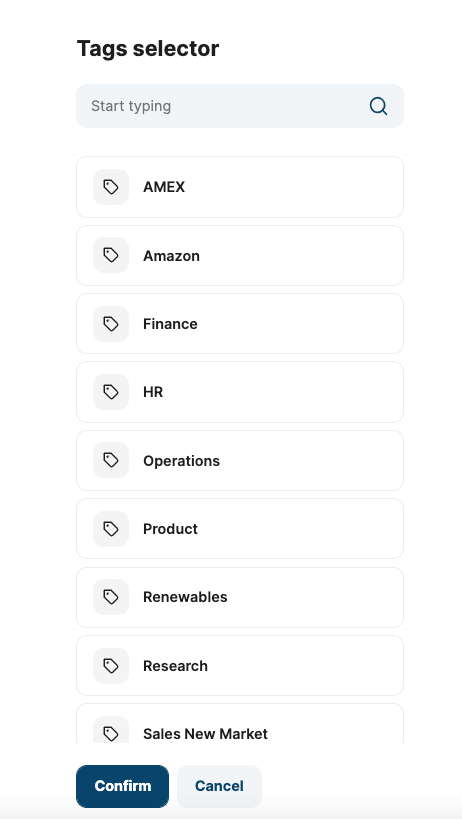
By typing in the search box, the list will be updated with matching strings. If the tag doesn't exist, a CTA will be shown to save the content of the search as a new tag.
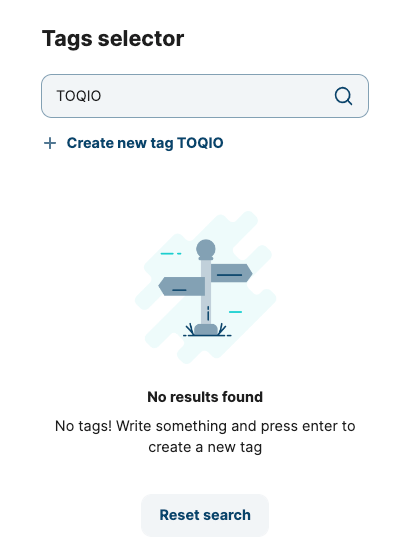
By selecting the action 'Create new tag', the new tag will be added to the list. It's important to highlight that any tag created will be available for employees, Directors, accountants, etc.
You can also assign as many tags as you need to the same expense by selecting the items in the list and selecting the 'Confirm' button. Expenses assigned with one or more tags will be listed in the tags tab in 'My expenses' - 'Analysis section' or in 'Company expenses' - 'Analysis section'. They can also be filtered from the 'Search and export' functionality.
Define as billable
Another available option is to mark an expense as Billable. If this selector is turned on you can search all the expenses saved as 'billable' or by combining the search with a tag, category, or merchant.
Add notes
Notes are saved as part of the expense and are indented to provide more information, reminders, or any other relevant text such as for accounting purposes.
Add comments
Comments are intended to be a private channel of communication. Since an employee only has access to their expenses, this opens a direct channel of communication with the manager or Director to discuss any relevant topic relevant to a given expense. These comments are therefore only visible to the expense owner, Directors, and managers. As mentioned above, these are not shown in the Admin portal as part of an expense to keep it confidential.
Dashboard:
When expenses are ON for SME, the user will land on a home screen after login in with some relevant information and a summary of expenses. On one hand, you will see at the top of the page, notifications about pending actions that should be managed to have healthy expense tracking. At the bottom of the page, some summary and graph tiles give an overview of the general status and time-related status of expenses.
](https://files.readme.io/76f5d0a-image.png)
Dashboard with expenses

Notifications
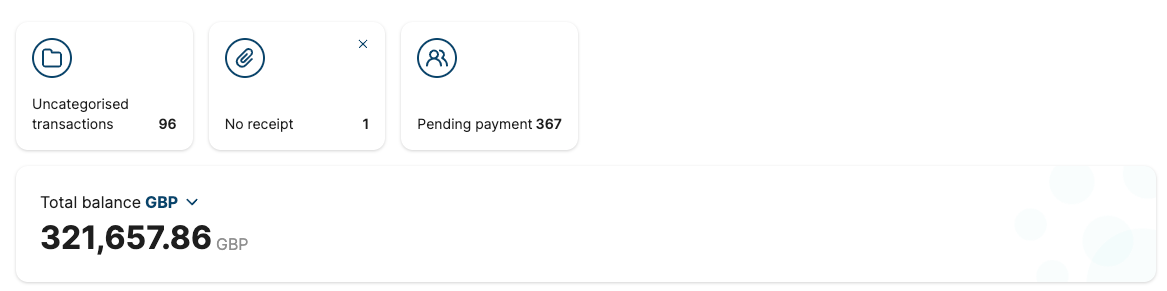
As shown in the image above, there are three types of notifications present:
- Uncategorised transactions: this tile shows the total number of uncategorised expenses. Based on the user's role, by selecting the notification two scenarios are possible.
- If permissions are set to manage company expenses the user will see two tabs: 'My uncategorised transactions' and 'Company uncategorised transactions'. The total in the notification will add up all the expenses without category.
- If the user doesn't have permission to manage company expenses, one single list will be shown with 'My uncategorised expenses'. The total in the notification will only show users uncategorised.
- Non-receipt: this notification reports in the same way as 'uncategorised expenses', but it lists expenses without files attached. Based on the user's role and permissions they will see their expenses or company expenses too. This notification has the particularity of being dismissible, by selecting the close icon placed on the top right corner of the tile. By closing it, the total will reset to 0 and will add up only expenses created after the date when the user dismissed the notification.
- Pending payments: this notification will be shown only to the users with appropriate roles and permissions and will lead the user to a list of manual expenses in status UNPAID.
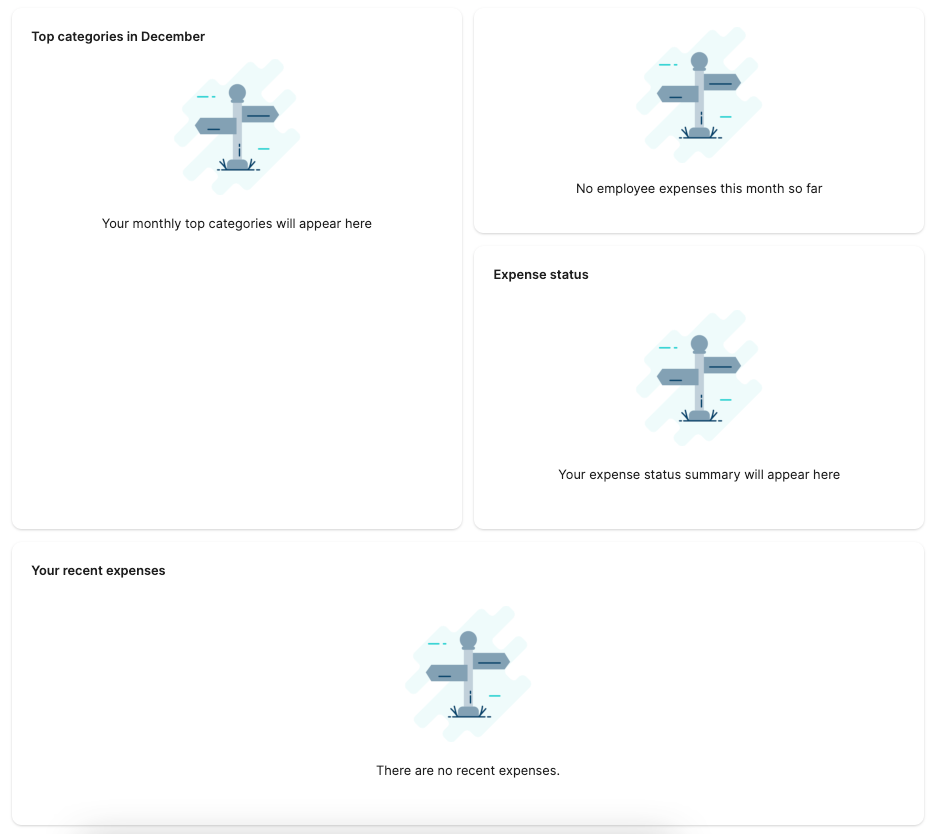
Tiles
By scrolling down the dashboard, you will find more summary tiles; top categories in the current month, a summary of all expenses status, expenses per employee in the current month, and users' last three expenses.
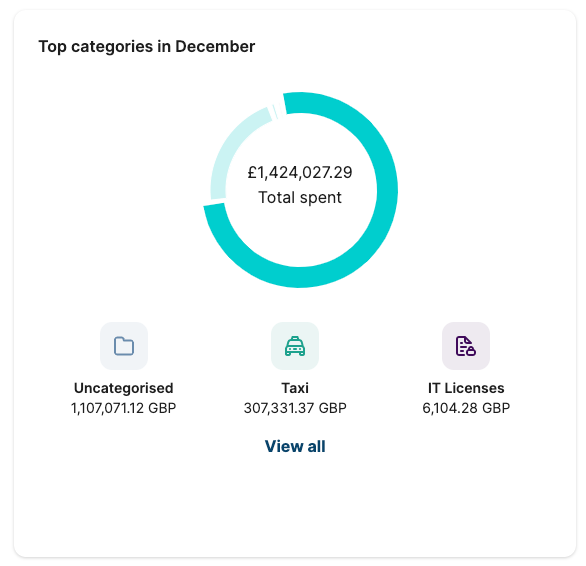
Top categories
This view is only available to roles with the capacity of seeing other users' expenses. This section provides insight into expenses for the current month and their categories. The graph is reset at the beginning of the month, and by selecting the 'View all' link a list of all expenses of the current month will be listed.
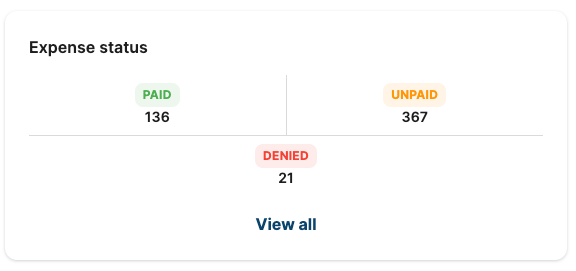
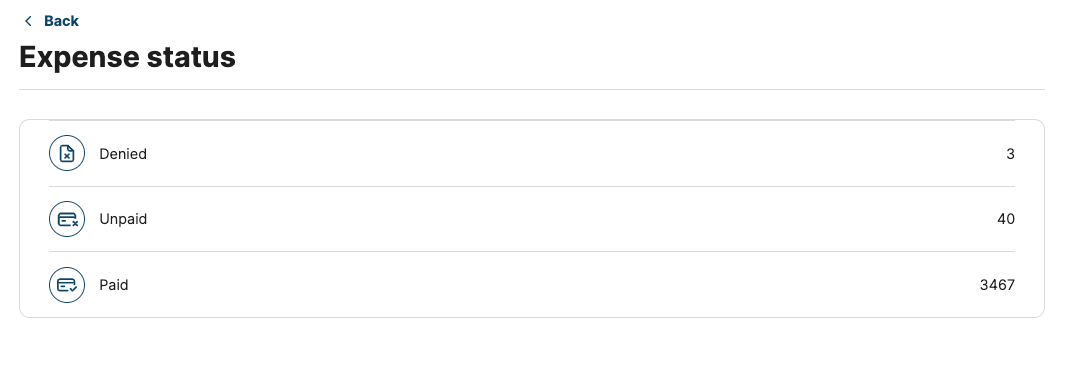
Expense status
This section tile will show all the expenses based on the payment status. By selecting any of the statuses, you will land on a filtered list per status without any date filter applied. Selecting 'View all' will show a list of statuses which, by selecting any of the items, will show the filtered list mentioned before.
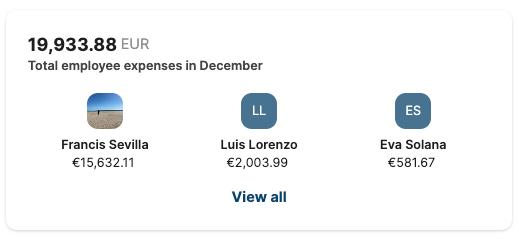
Total employee expenses in the current month
This view is only available for roles with the capacity of seeing other users' expenses. The top three employees with the highest spent amount in the month are presented. Any of the employees can be consulted by selecting 'View all' on their name, here the user will land in the appropriate analysis list of expenses of the current month grouped by transaction owner.
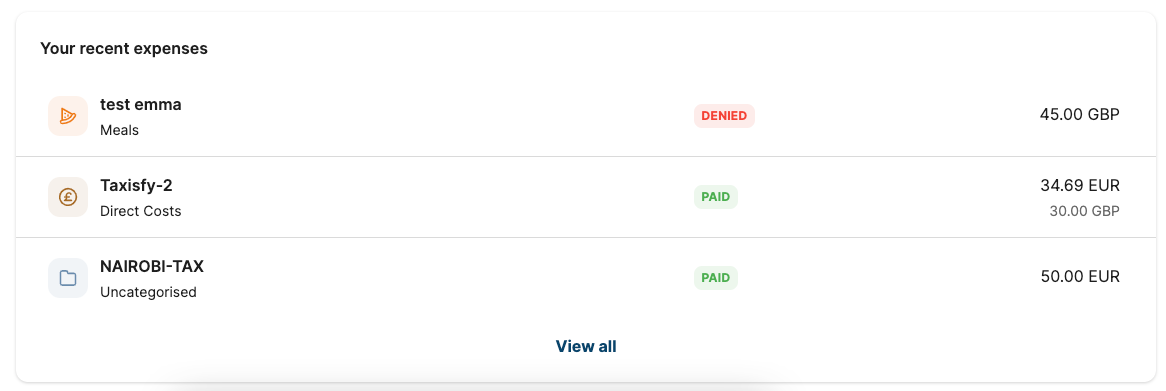
Your recent expenses
Your last three expenses are listed, and all of them are actionable by selecting the item on the list, this will drive you to the expense detail. The 'View more' link will land you in a list of expenses made by yourself.
Updated 7 months ago